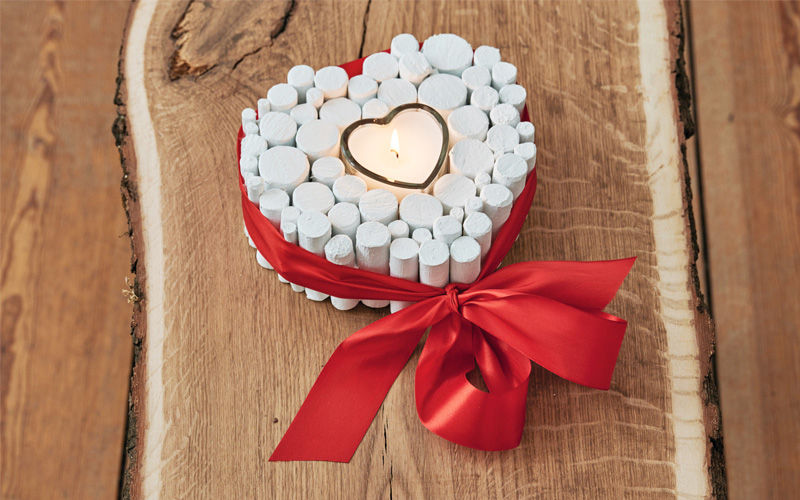
From the Heart: DIY Heart-Shaped Candle Decoration

Make an impact with your love and show just how much you care with a handcrafted heart-shaped decoration. The easy-to-make design is the perfect representation of your love and appreciation and is sure to leave a lasting impression. Your special someone will cherish this meaningful, one-of-a-kind gift for years to come.
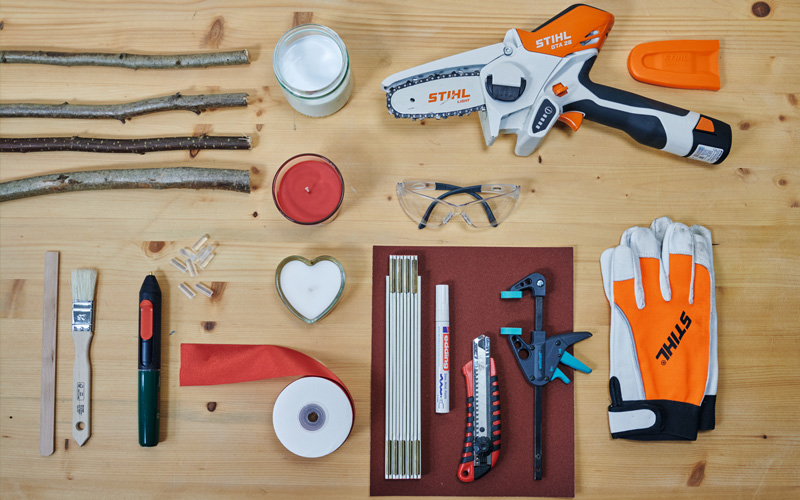
WHAT YOU'LL NEED:
- STIHL GTA 26 or pruning saw
- Safety glasses
- Gloves
- Ruler
- Marker
- Glue gun
- Craft knife
- Sandpaper
- Paint
- Twigs or branches
- Paintbrush
- Ribbon
- Candle with candle holder (Note: the candle must always be placed in a glass candle holder for safety reasons.)
STEP BY STEP GUIDE
With all the necessary materials at hand, you're ready to begin crafting your special heart-shaped gift.
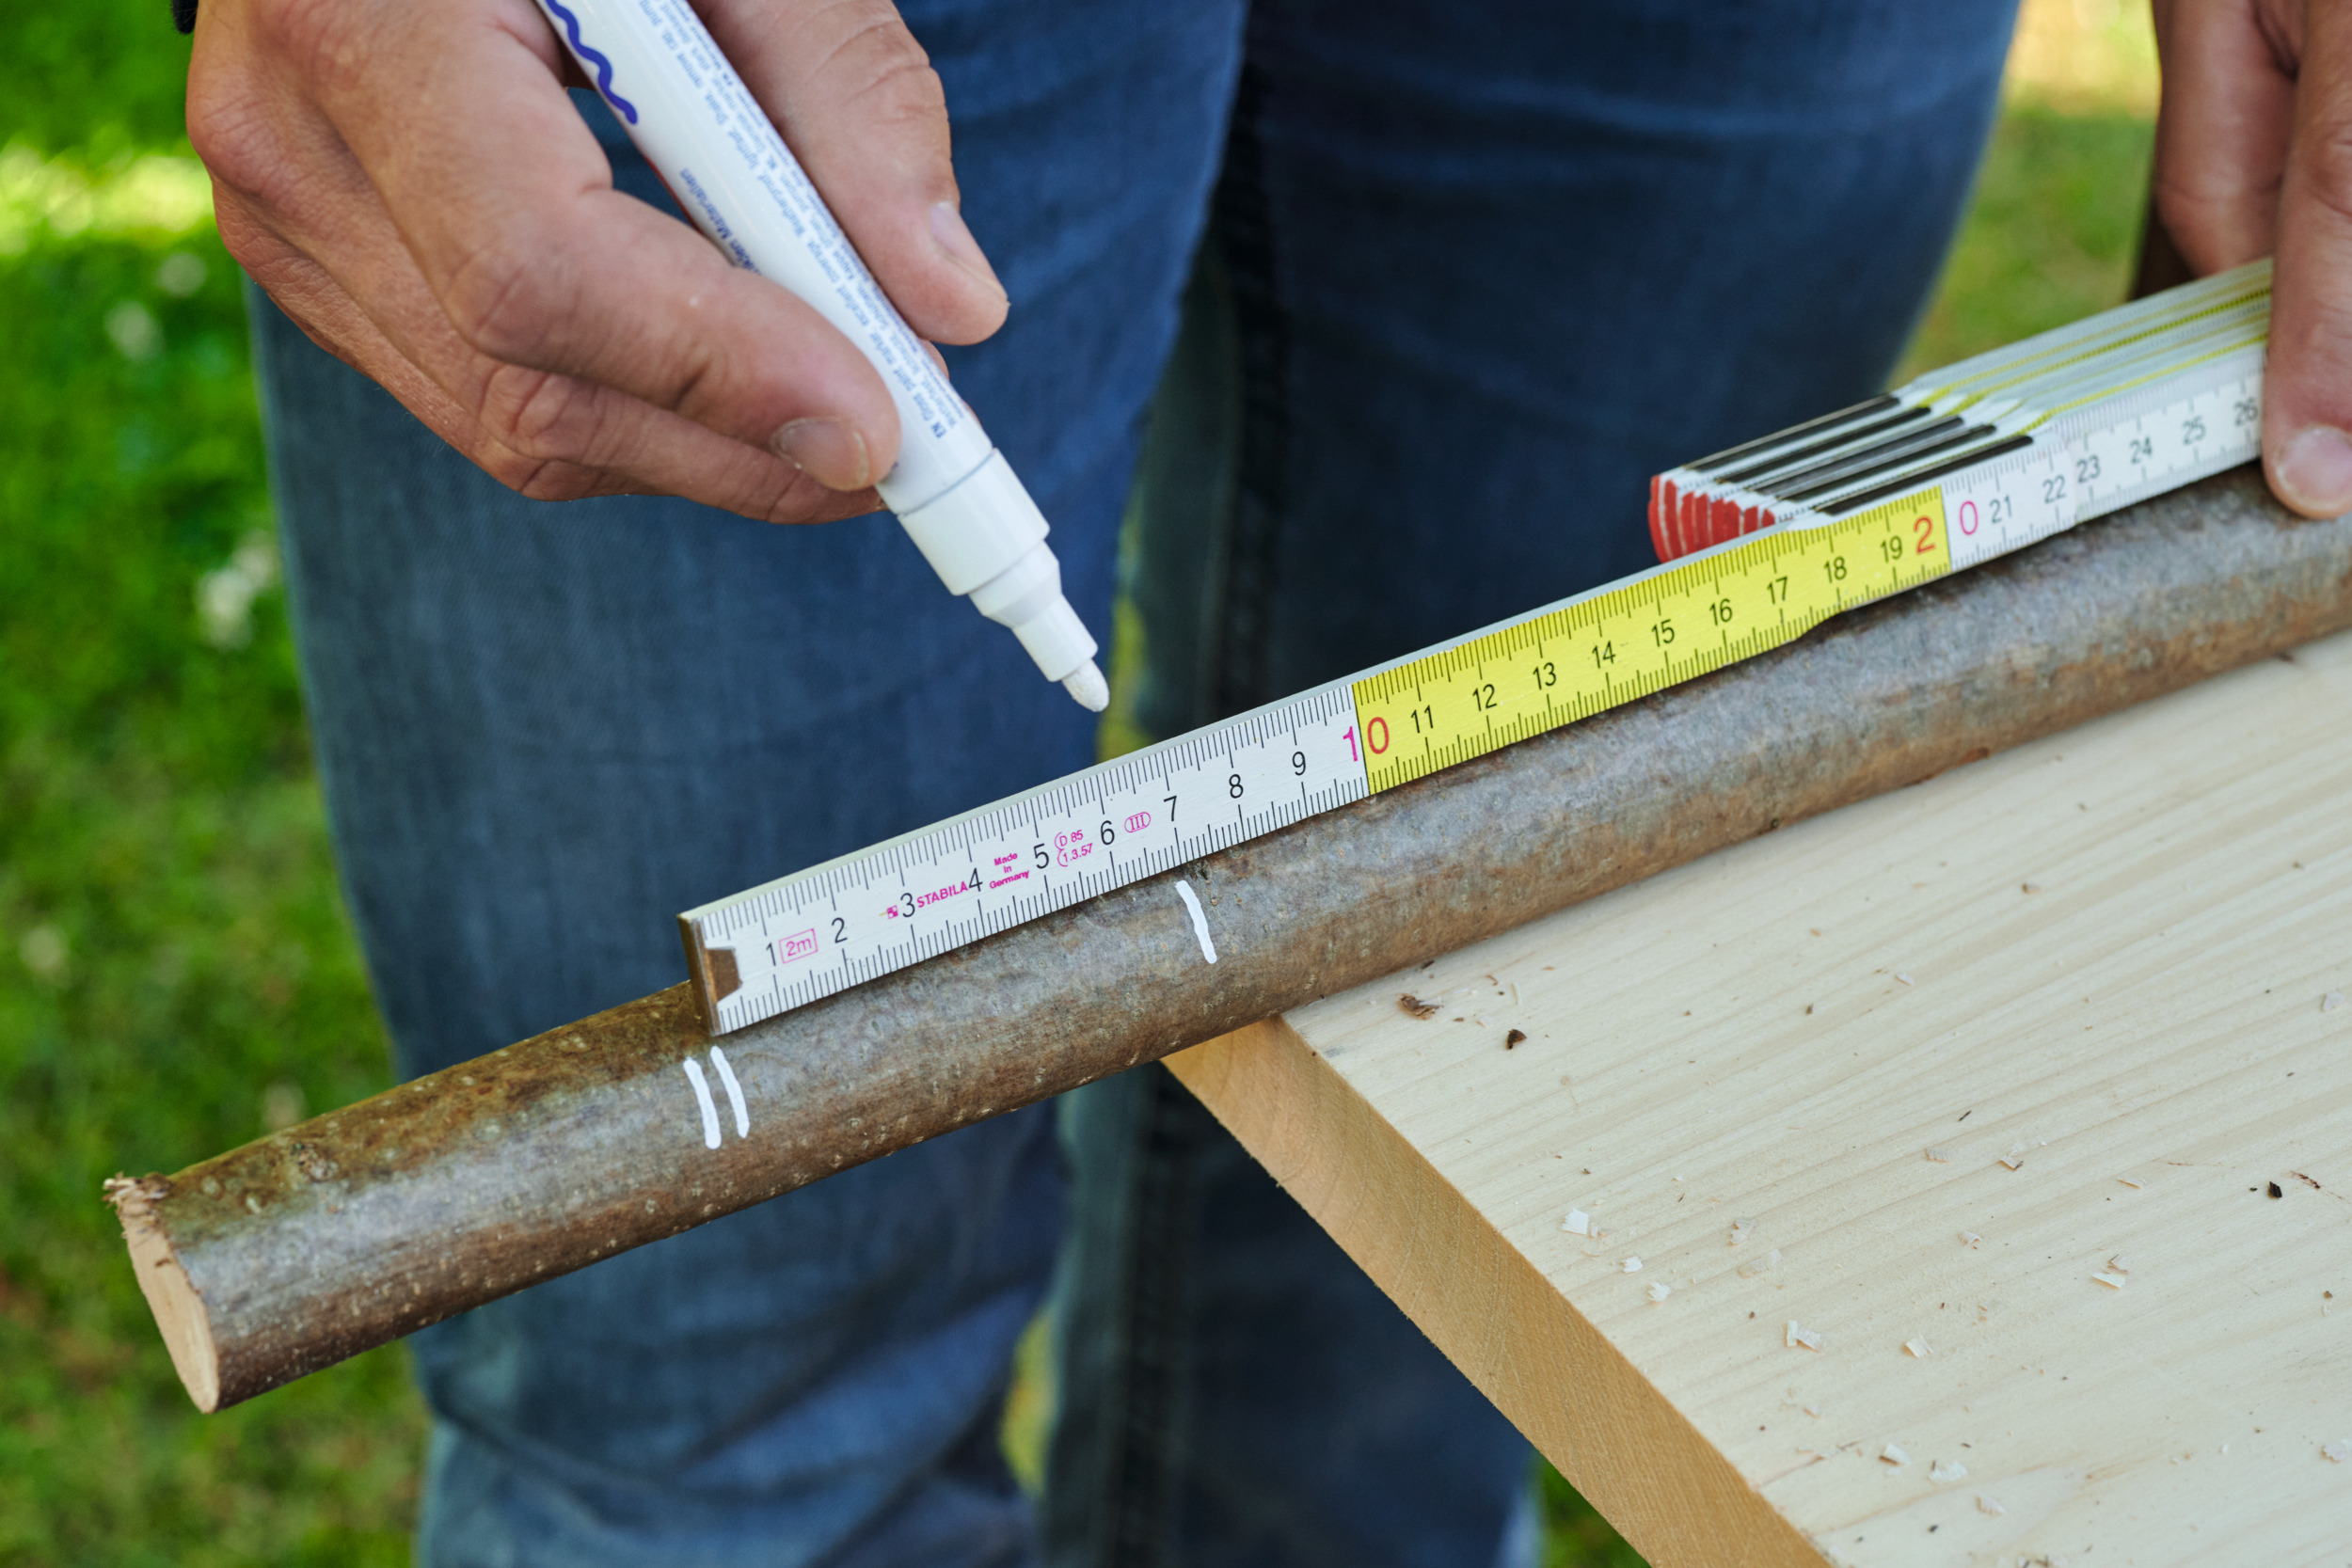
STEP 1: MARKING THE BRANCH FOR CUTTING
Select your branch and secure it onto your work station. Using a marker, mark your branch about every 7cm.
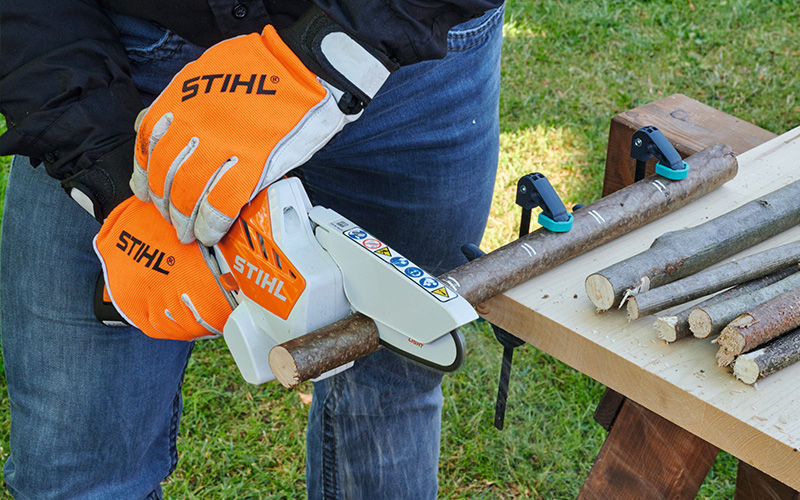
STEP 2: CUT THE TWIGS TO THE RIGHT LENGTH
Saw the branch at the marked points using an electric saw like the STIHL GTA 26 or a pruning saw.
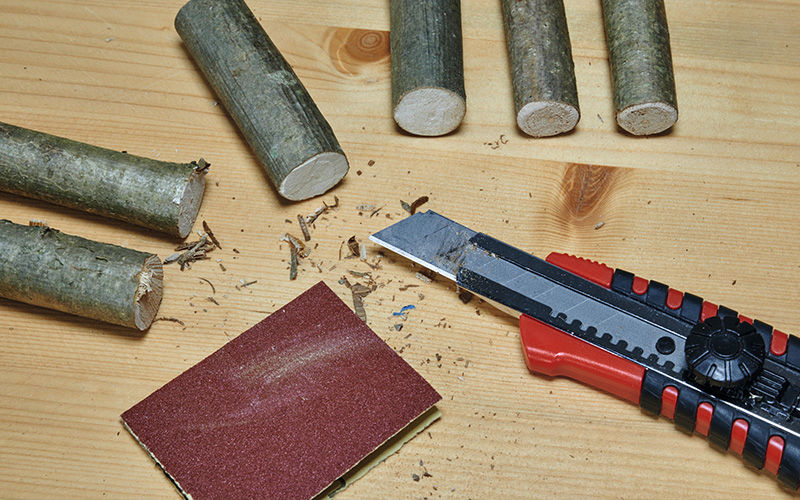
STEP 3: SMOOTH OUT THE EDGES
Your cut branches may have frayed edges and loose wood fibres. Use the craft knife to remove them and sandpaper to smooth out the edges.
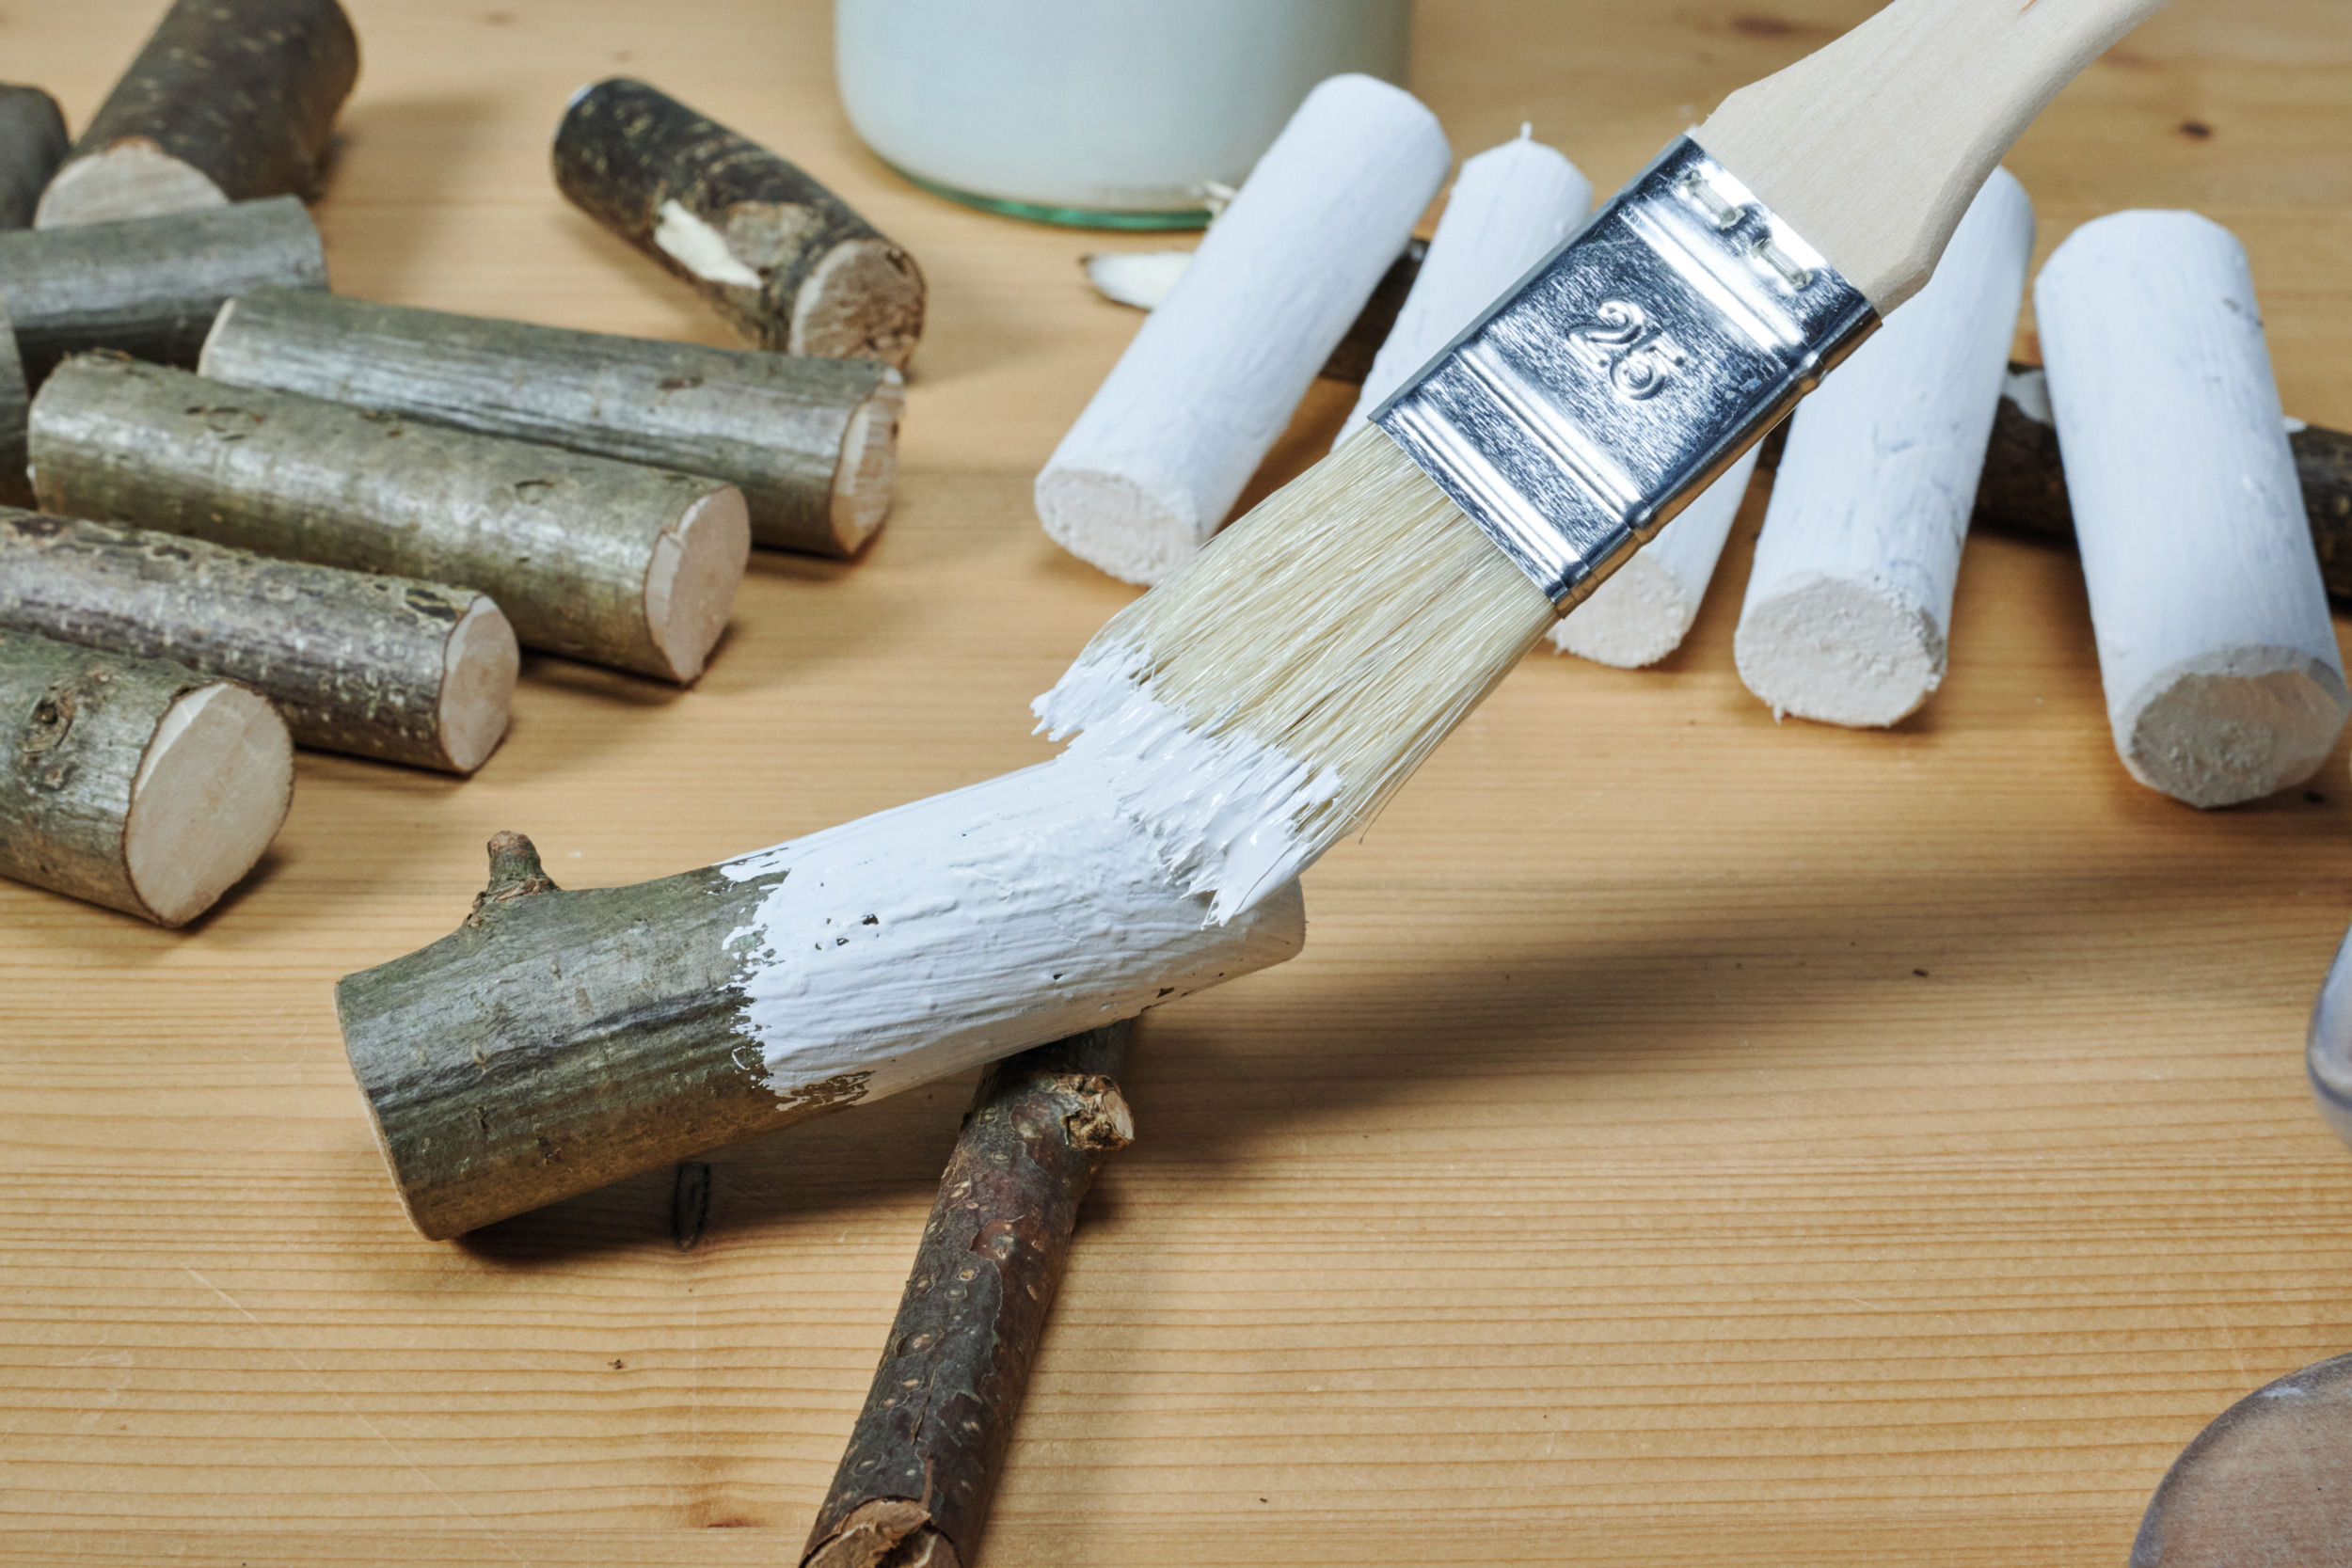
STEP 4: PAINT THE WOOD
Using the colour of your choice, paint the branches and allow them to completely dry.
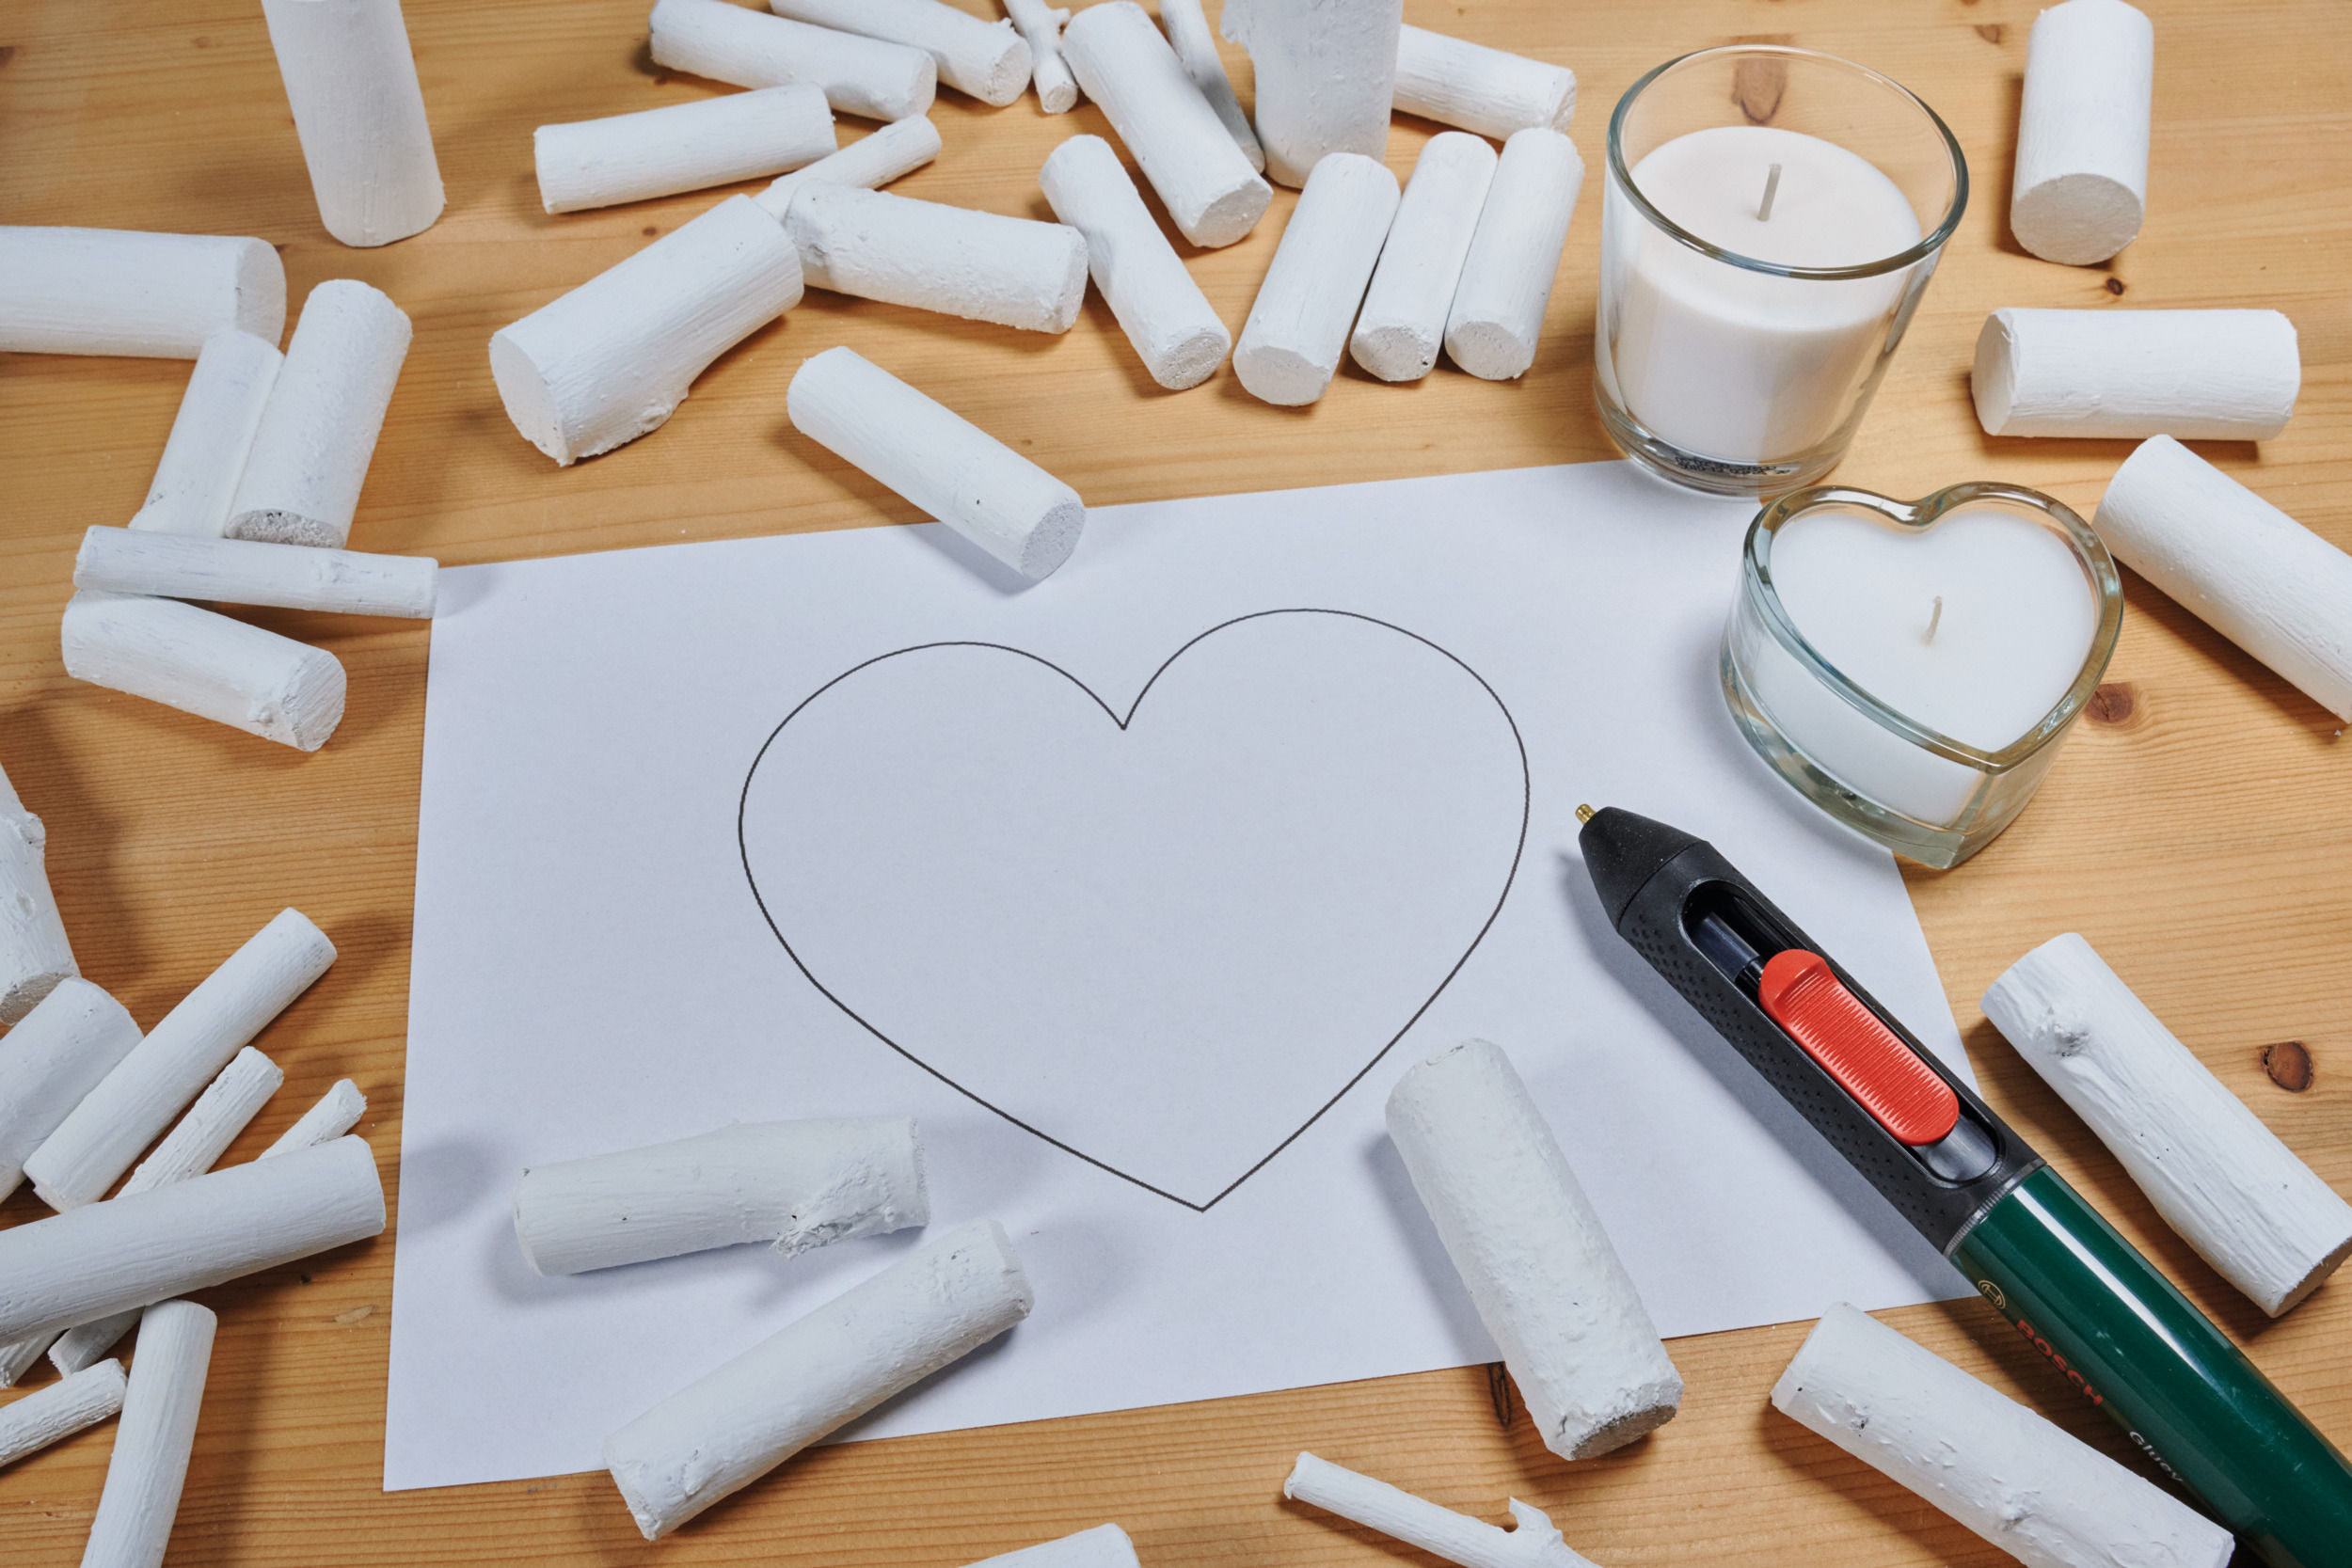
STEP 5: PREPARATION OF THE TEMPLATE
To ensure a symmetrical heart shape, draw a heart on a piece of paper or print out a template. The template serves as a guide to help you position the branches around the candle in the correct shape.
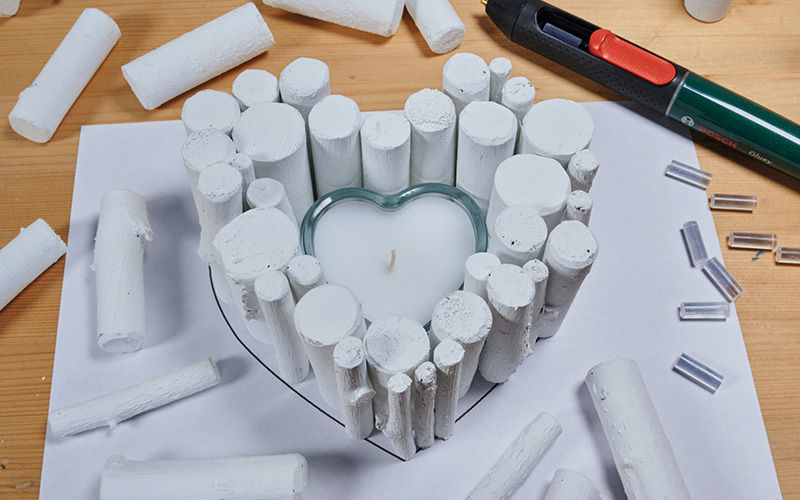
STEP 6: GLUE THE BRANCH PIECES TOGETHER
Place the candle with a flame-retardant holder made of glass or a similar material in the centre of the heart template. Secure the painted branches around the candle using hot glue, attaching them only to each other, not the candle holder. Continue adding branches until the desired shape and size is achieved.
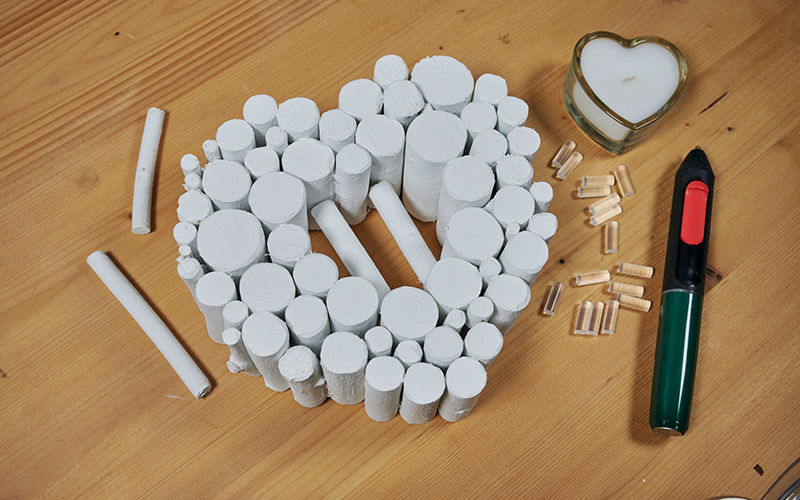
STEP 7: CANDLE HEIGHT AND PLACEMENT
To prevent accidental fires, keep the candle flame burning above the surrounding branches. To do this, secure two branches in the centre, place the candle on top, and adjust the height until you're satisfied with its placement.
STEP 8: ADD A RIBBON
Once you're happy with the shape and size of your wooden heart, complete the look by adding a decorative ribbon to it.

