Cart
You have no items in your shopping cart.
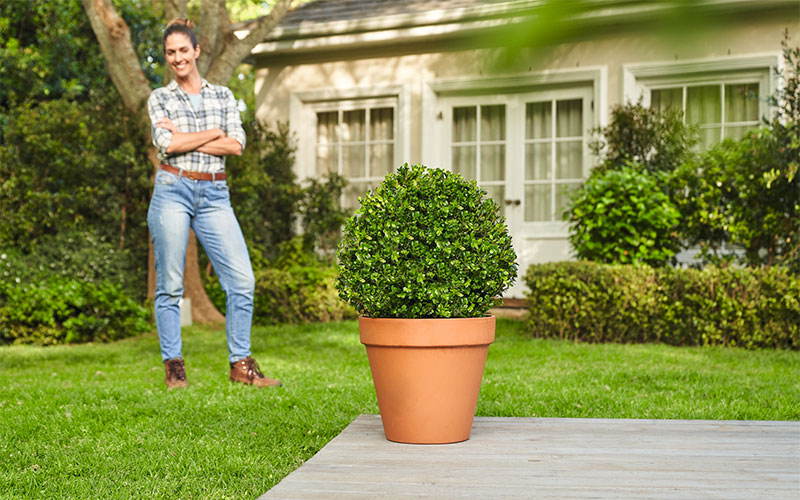
Transform your garden into a stunning masterpiece with Topiary! A statement piece of green art is the perfect addition to any space, big or small. Create a masterpiece that you can be proud of and enjoy for years to come.
Our step-by-step guide will show you how to easily cut your plants into a beautiful ball shape that will make your garden the talk of the town. You'll love the feeling of accomplishment that comes from creating your own piece of living architecture.
But why stop at just a ball shape? With the same technique, you can create other shapes and even larger Topiary! And don't worry about maintaining your Topiary - we've got you covered with tips and tricks.
Get ready to elevate your garden to the next level with Topiary. Let's get started!
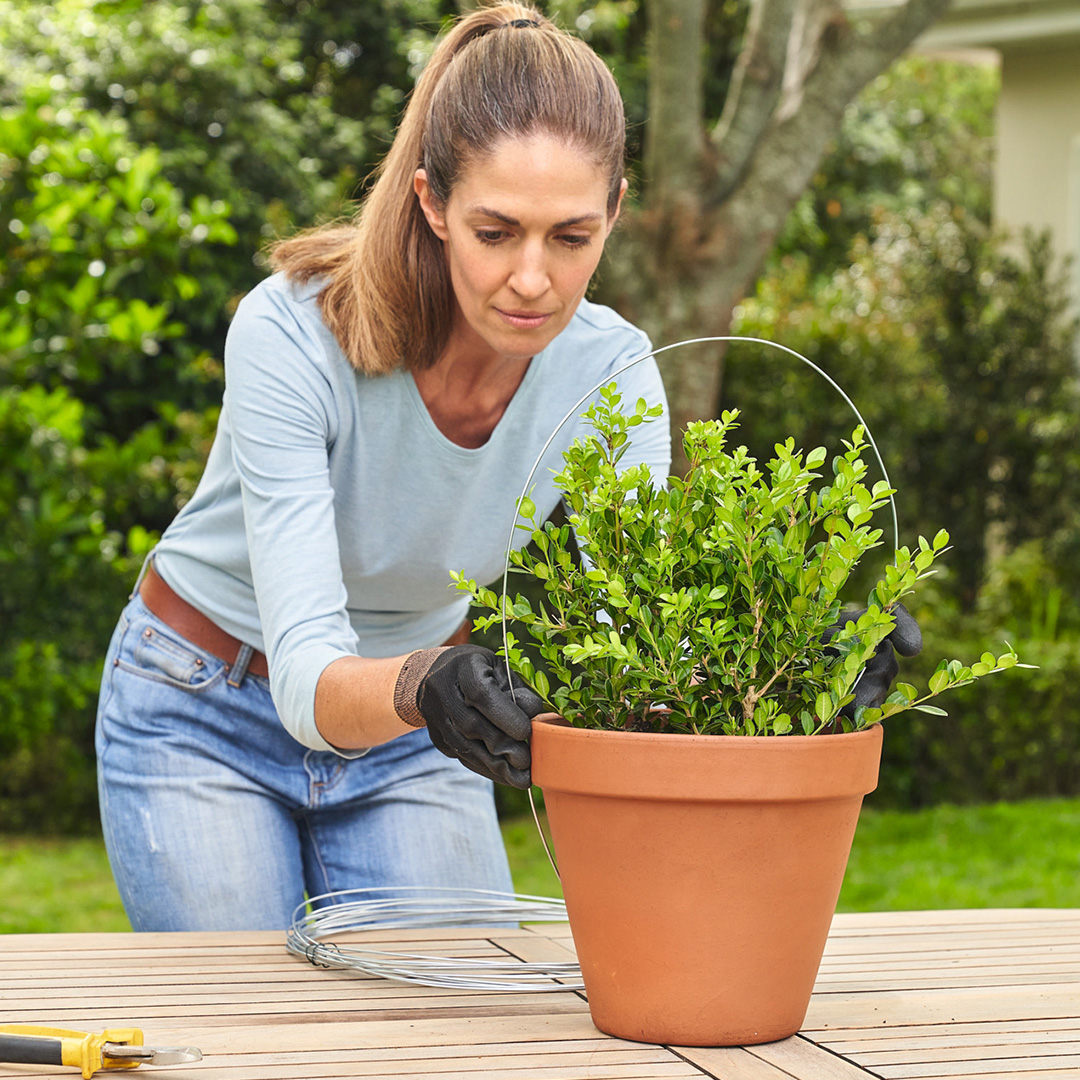
Wrap wires above your plant and insert the ends into the soil to form a dome, connect the wires together with a cable tie.
Wrap wires above your plant and insert the ends into the soil to form a dome, connect the wires together with a cable tie.
Leave the frame in place while your plant grows.
Leave the frame in place while your plant grows.
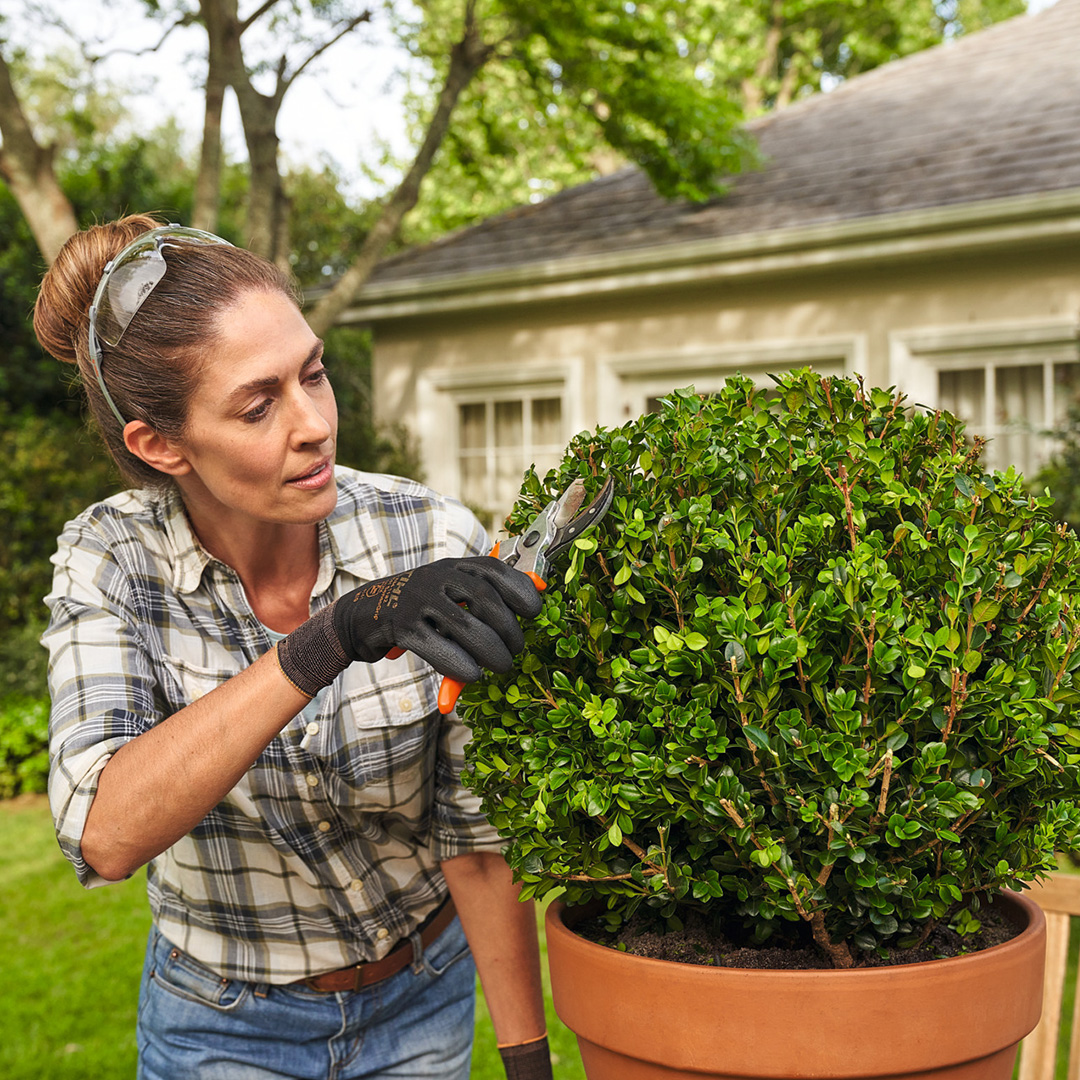
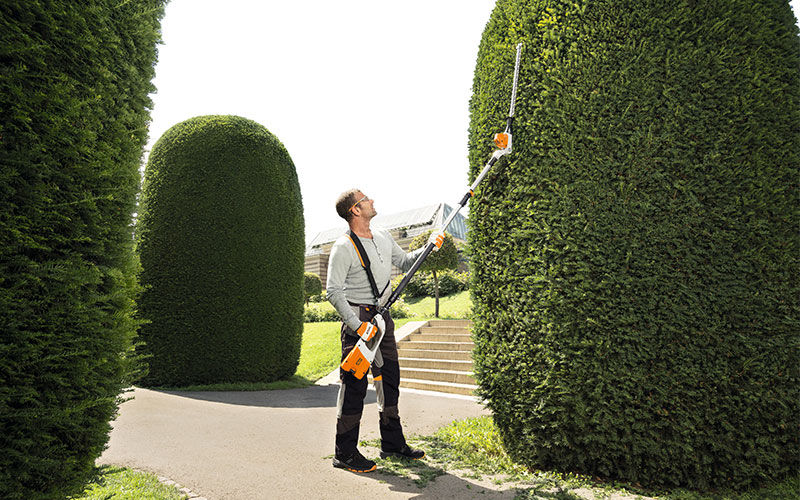
Once your plant has grown enough, use your Hedgetrimmer to remove any protruding shoots that have grown out. To create smoother curves, rotate the entire Hedgetrimmer not just the blade. Use a pair of Secateurs or Loppers to adjust the shape if needed.
You can keep the frame in the plant so it's easier to maintain.
Looking to achieve perfectly trimmed topiary designs, no matter the size? Follow our expert tip: take your time and don't rush the trimming process. Start by removing any wispy growth with your first trim, and step back to check the shape before moving on to creating a more defined look. Just like trimming a hedge, it's important not to try and do everything at once.
If you're new to hedgetrimming, don't worry! Getting comfortable with cutting straight edges before diving into the more artistic side of topiary design, will set you up for success.
LEARN HOW TO TRIM A HEDGE HERE
Remember, for optimal results, avoid taking off more than 30% of the plant during your initial cuts to ensure its continued growth and vitality.

If you are leaving the frame in your plant, you can use loppers or secateurs to cut the topiary back to the frame.
Only trim topiary once a year at the mid-end of summer once the tree/plant has had most of its growth for the season. Feed the tree/plant with plant food twice a year before and during the growth seasons. Train the new branches as they grow with soft stretchy ties to create less damage on the branches.
If you don't have a frame, you can of course freehand and eyeball the growth you need to take off. But for more accurate cuts, it is better to use a template for guidance. It's simple to create a template, all you'll need is cardboard or wood, a measuring tape, string and a pencil.
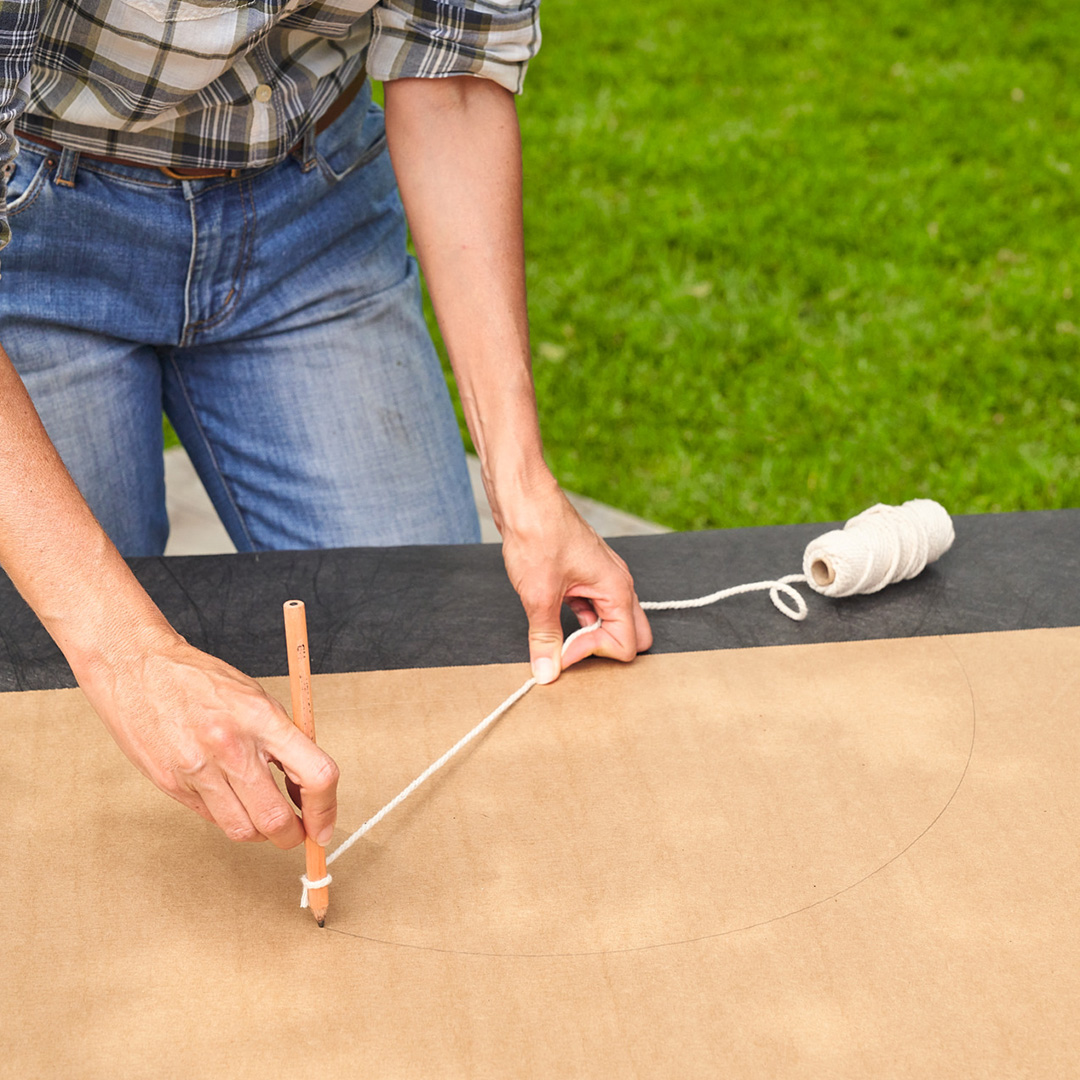
Measure the circumference you want for your plant, take a piece of string half the length of the diameter you have measured. Use this to help you draw a semicircle on a piece of cardboard or wood. Cut out the semicircle – your tailor-made template is ready!
Measure the circumference you want for your plant, take a piece of string half the length of the diameter you have measured. Use this to help you draw a semicircle on a piece of cardboard or wood. Cut out the semicircle – your tailor-made template is ready!
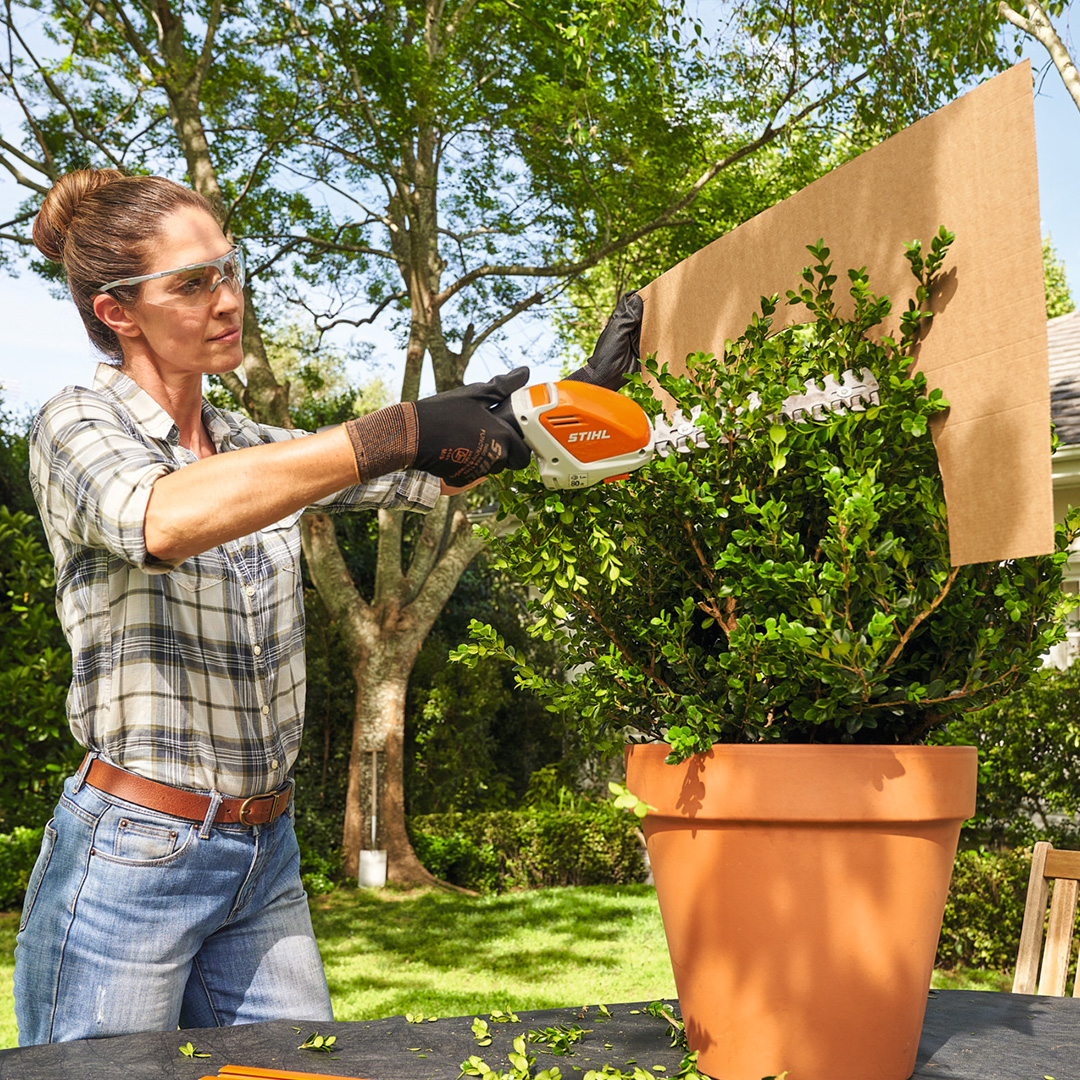
Position the cardboard template on the plant and cut your plant to match the template using a Hedge Trimmer. As you trim, adjust the angle gradually so you also reach the lower sections. Tilt the cardboard by 90 degrees.
It is worth taking your time, and checking progress regularly as you work through your plant. This will make all the difference to the final result!
Position the template on the plant and cut your plant to match using a Hedge Trimmer. As you trim, adjust the angle gradually so you also reach the lower sections. Tilt the template by 90 degrees.
It is worth taking your time, and checking progress regularly as you work through your plant. This will make all the difference to the final result!
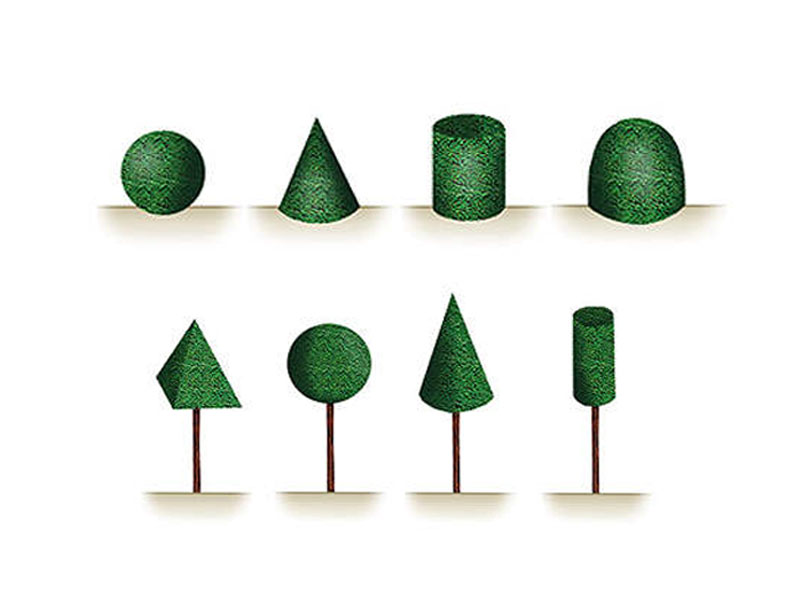
To create topiary shapes, it's best to choose densely growing, typically evergreen species.
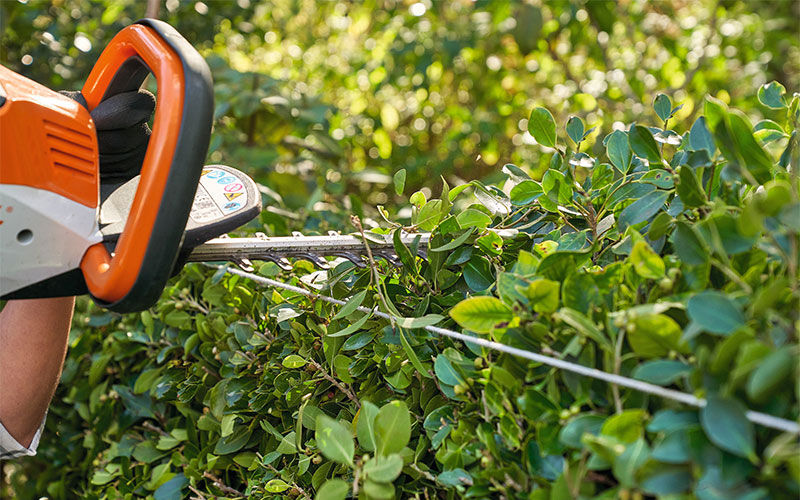
The secret to achieving perfect geometric shapes every time starts with precise and accurate cutting techniques. To achieve straight edges, create a guide of the desired shape using a taut string line. Simply place it over the shrub, trim off any protruding growth, and voila!
Large pot plants are particularly suitable for geometric standard shapes.
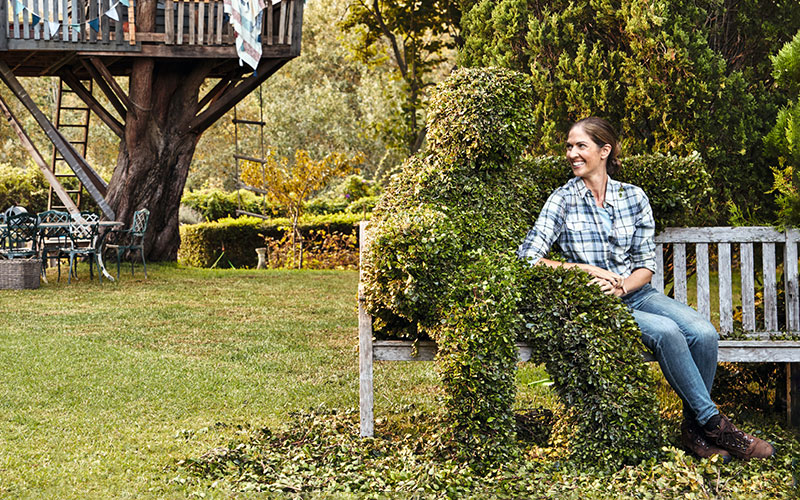
Want to create breath taking topiary designs that will make your garden the talk of the town? Look no further! Support your designs with a sturdy metal frame to guide their growth. You can purchase pre-made frames in various shapes, or let your creativity soar by crafting your own with galvanized wire, which won't rust. For 3D designs, avoid sharp corners and opt for soft, organic shapes like circles, hearts, and ovals.
Once you've mastered the basics, the sky's the limit! Experiment with different shapes and create your own unique designs. Get artistic and combine simple shapes, like cones and spheres, to create more complex and intricate forms, such as animal heads.
A few expert tips when working with larger plants and trees:

When trimming hedges or topiary your blade will get sticky with sap use a resin spray to clean it. You must also keep your blades sharp.
LEARN TO LOOK AFTER YOUR HEDGETRIMMER HERE

