Cart
You have no items in your shopping cart.
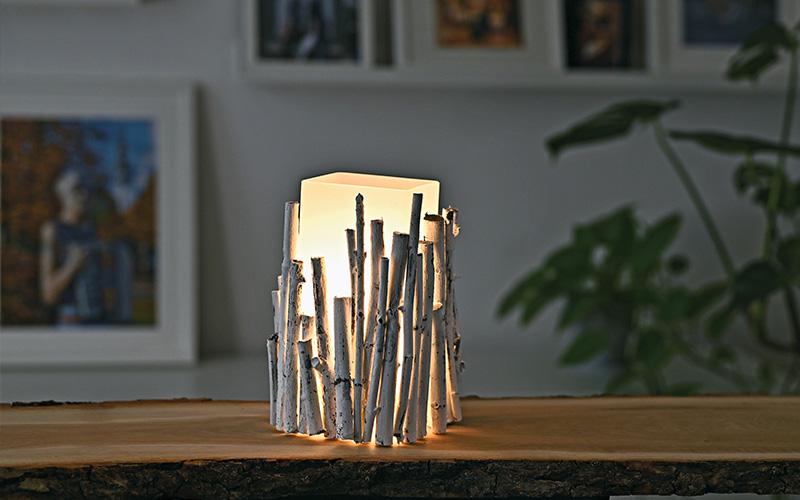
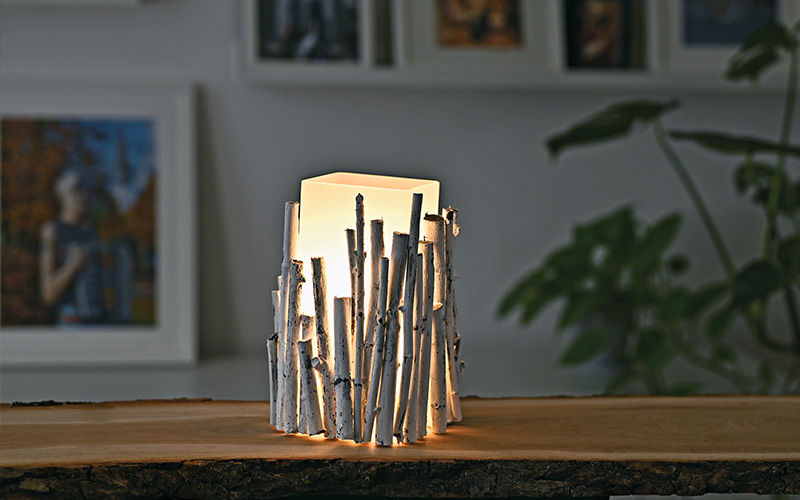
Crafted using twigs and branches, from your very own backyard, this lamp adds a touch of rustic elegance to any room. Gather your supplies and embark on this fun and easy DIY project that's sure to leave a lasting impression!
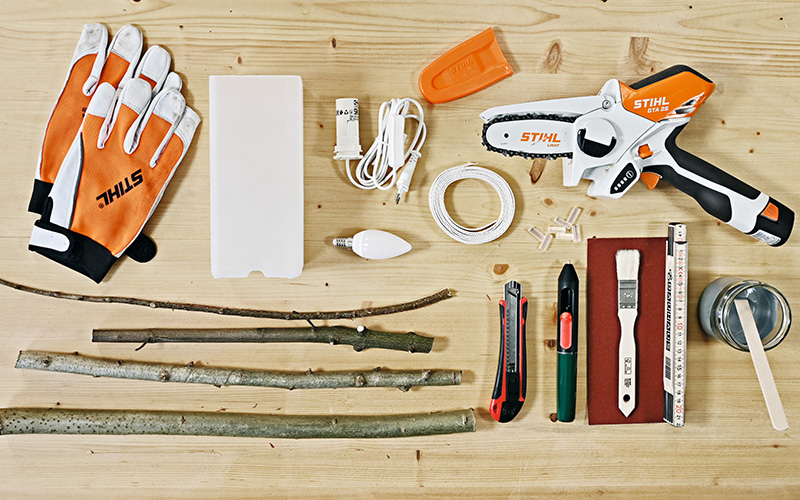
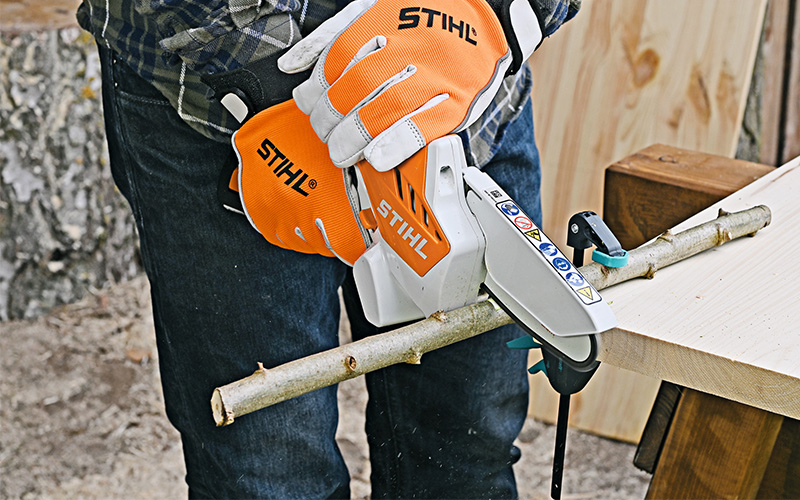
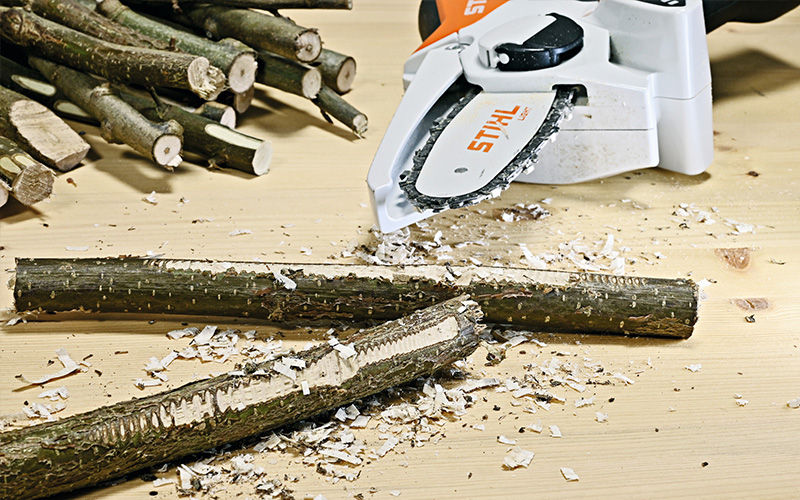
Select a branch, secure it onto your workbench and saw it to the desired length using your garden pruner such as STIHL GTA 26 - keeping in mind the height of the lamp.
As an optional step, use your garden pruner to gently scrape off the outer layer of bark in certain areas, this allows you to create visually striking patterns and effects to your rustic table lamp.
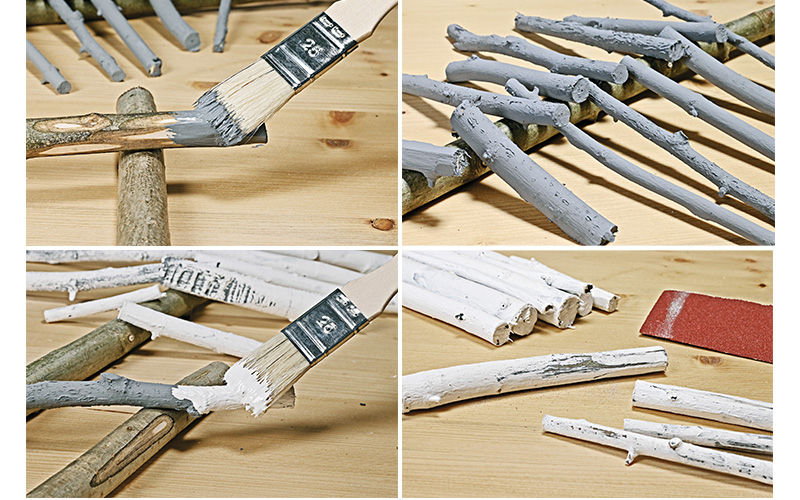
Paint your branches any colour of your choice and allow it to dry. Once the paint has dried, apply a coat of white on top. Once this coat of white paint has dried, you can gently sand down certain areas using sandpaper to reveal the underlying paint color, creating a rustic appearance.
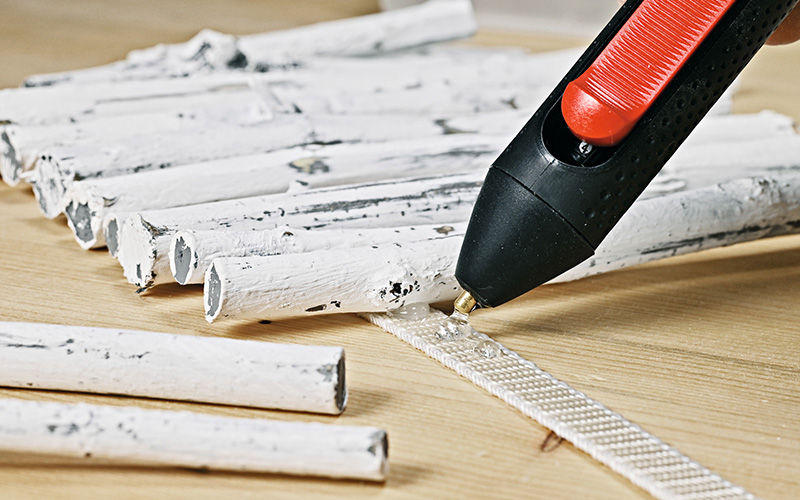
Cut a strip of material to fit the circumference of your lamp. Take the painted and finished pieces of wood and attach them to the strip using a hot glue gun. Ensure that the pieces align at one end and are closely positioned together.
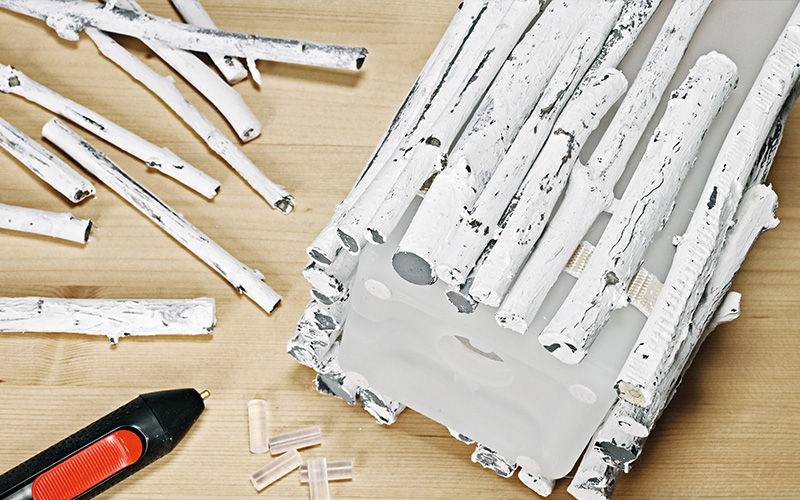
Finally, use your hot glue gun to attach the strip of branches to the lamp, positioning the branches so they stand upright. Fill any gaps with smaller twigs using more glue.
Once you've added a light bulb, your rustic table lamp is ready to bring a warm glow to your home!